A complete guide to adding RTL support to your Custom WordPress Theme

Translating a website to another language can be an easy task with some plugins. However, while many languages read left to right (like English), there are a lot of languages that are read from right to left. Adding the RTL (Right-to-Left) support to your custom theme gets easier with the below process. It is the matter of updating your theme CSS.
Simply translating these sites will not work properly. We should do some coding with the CSS & HTML for meeting the design requirement of the website.
Make your theme to support all language styles, no matter which direction they read, makes your theme translation-ready for every situation. Fortunately, updating your theme to support the right to left languages is relatively straightforward. With a few design considerations and style tweaks, you can adapt any WordPress theme to work with RTL languages.
Step 1: Create the RTL CSS for Your Theme
The first step is to create the CSS for displaying RTL languages correctly on your website. There are two methods for doing this.
Simply copy-paste your existing stylesheet into a CSS RTL generator. This tool will examine your current CSS and attempt to make a copy, but switching all the left and right alignments. This effectively creates a mirrored version of your website.
Here are the two sites we recommend:
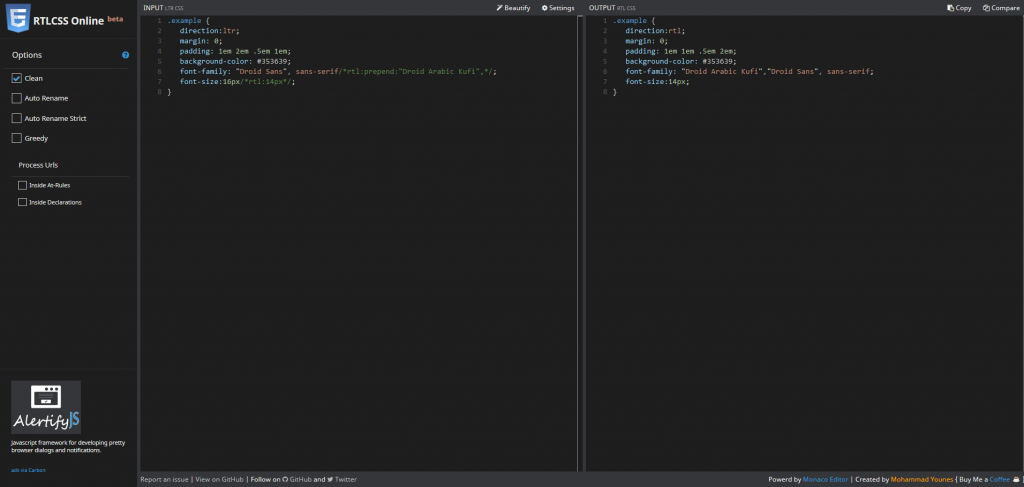
This tool is very simple, you can type your Left-to-Right (LTR) CSS in the left-hand panel, click the Submit button, and see your RTL CSS on the right.

This framework has a very detailed set of instructions, and at current writing is also beta testing a live converter tool.
Once you have generated the new CSS, save the resulting styles as a file named style-rtl.css.
The second method is a little more tedious because it involves an ‘override’ stylesheet. In this version, you will go through each line of your CSS and manually move all horizontal positioning elements into a separate file named rtl.css and mirror them. This results in a smaller file but ultimately takes a lot more work to keep up with, especially as you continue to make new updates and changes to your theme.
To do this, first, add the following code to the top of your rtl.css file:
body {
direction: rtl;
unicode-bidi: embed;
}
Rest of your css selectors, you should switch each left or right positioning to the opposite. Look for text-align, float, etc. However, the exact selectors you switch will be based on your website design needs.
If you need to display any background images indicating a specific direction, you will need to provide a flipped version and update the reference to it in the rtl.css stylesheet as well.
All these attributes need to be ‘zeroed’ for the original image, before setting a new value:
- margin
- padding
- borders
- background-position
- right and left positioning
Step 2: Enqueue the RTL Stylesheet
If you are using a CSS generator tool, you will now need to enqueue your new style-rtl.css stylesheet so WordPress can load it in, at the appropriate time. This is just a matter of adding a snippet to your theme’s functions.php file:
function enqueue_mytheme_stylesheet() {
wp_enqueue_style( ‘themeslug-style’, get_stylesheet_uri() );
wp_style_add_data( ‘themeslug-style’, ‘rtl’, ‘replace’ );
}
add_action( ‘wp_enqueue_scripts’, enqueue_mytheme_stylesheet’ );
This will load the correct stylesheet when the website is set to an RTL language. You have been already using enqueue properly to load in your regular styles.css stylesheet, then you can simply add the wp_style_add_data() information into your existing enqueued styles function.
However, when using a dedicated override stylesheet, you will not need to load in any special functions. WordPress will simply load in the rtl.css file after your regular styles.css, which will overwrite directional cues using the secondary file.
Step 3: Test Your RTL Styles in Website
The next process is to test whether everything is working correctly on your website. You can use the RTL Tester plug-in or change the language from the admin section (Dashboard > Settings > General > Site Language).
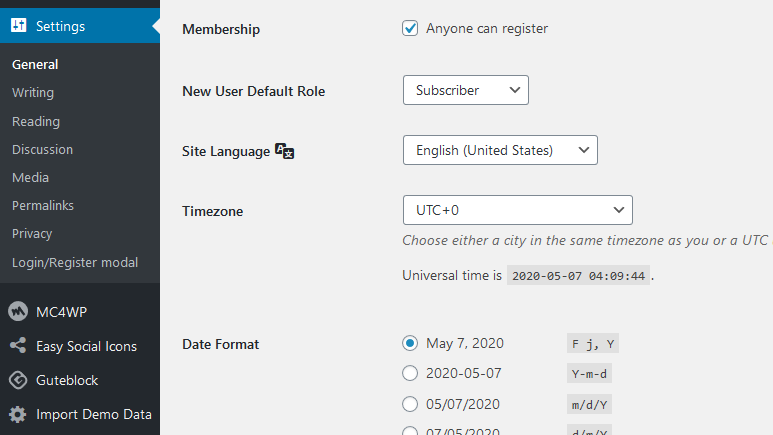
Once you changed the language, you can check whether it is working properly or not.
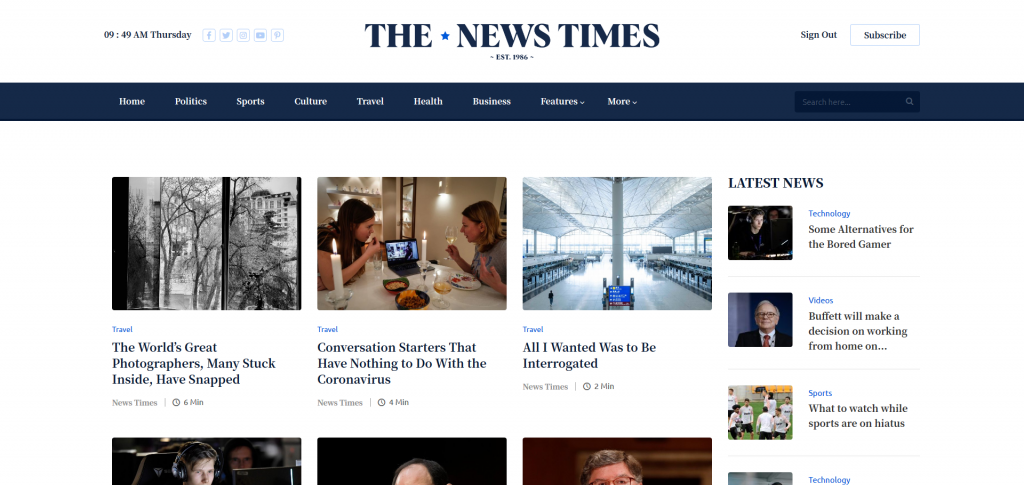
English Version:

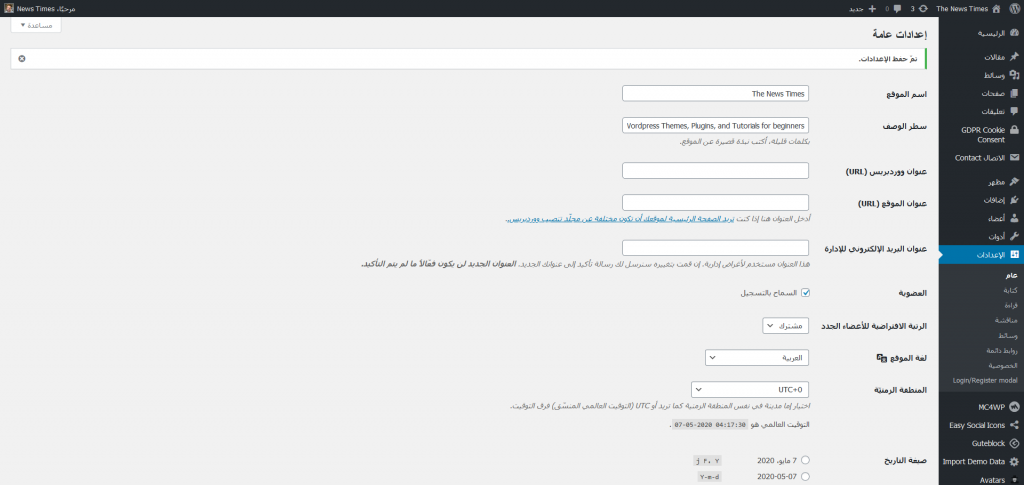
Arabic version:
There are two plugins for testing the RTL language. First, there is the general RTL Tester plugin. Once installed and activated, this essentially flips the switch on your entire website, telling it to load all RTL-specific styles. Second, there is WP-RTL, which lets you switch between different directional languages within a single post.
With these two plugins, you should be able to quickly test the layouts look like with different RTL or LTR content. We recommend using WordPress’ Theme Unit Test Data to make sure you are covering practically every permutation of text styles and formatting when adding RTL styles.
Step 4 – Enable RTL Support permanently
Open the wp-config.php file and add the following:
define (‘WPLANG’, ‘ar’);
Then the website language is set to Arabic as a default language.


